In a previous post I wrote about how to install the Kindle App for iPad and explained how to download Kindle books through the Cloud and onto your device.
Since then, the Kindle App for iPad has been updated several times with a new layout and now offers some new features.
Whether you are preparing to go on vacation, commuting to work or will be reading some books at home, I’m sure you will find the following tips about Kindle for iPad very useful. Let’s get started…
Open your Kindle App
If you don’t have the Kindle App on your iPad or want to know how to download new books, follow these instructions to get you started.
Understanding ALL and DOWNLOADED (former Cloud and Device)
After you sign in with your Amazon account, the main screen (Library) will display a list of books. On the top of your screen you will find two links or menus. ALL and DOWNLOADED.
ALL refers to Kindle books purchased and stored on your Amazon account. They can be free or paid books. DOWNLOADED refers only to the specific Kindle books from your Amazon account that have already been downloaded onto your iPad.
Tapping on a book while on ALL mode will download the book onto your iPad device. Tapping on a book cover while on DOWNLOADED mode will open the book to begin reading.
Menus and Slider
At any time, while reading the book, you can tap once in the middle of the screen to change your font, discover other reading options or leave the book.
The top menu and the bottom slider will appear.
Close book – Table of Contents
The first item on the top menu ( arrow down) allows you to close the book and go back to the DOWNLOADED section. The 3 lines on the menu display the table of contents and the magnifier lets you go to a specific book page (using Location).
Search Menu
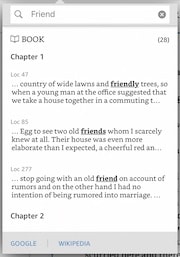
The magnifier menu lets you search for specific text within the book.
Font Menu
The “Aa” menu is divided into four submenus (Themes, Font, Layout and More).
From here you can control the brightness options, font size, font type, layout, background color (White, Black or Sepia), text width and line spacing as well as enabling page turn animation or displaying a clock while reading. You can choose from a set of predefined themes or customize and save your own.
Bookmarks and Notebook
The bookmark menu allows you to place a bookmark on a specific page. The “My Notebook” menu lists the bookmarks and notes that you have so you can come back to them later.
Sharing Menu
This menu lets you share a sample of an Amazon book with a contact.
Page Slider
Since the Kindle App lets you choose font size, type and line spacing, instead of page numbers, the App uses location % to indicate your overall position in the book.
The slider allows you to quickly navigate the book without having to flip pages.
X-Ray Menu
X-Ray is a reference tool that allows readers to learn more about a character, event, or place. Information can be sorted out by relevance, alphabetically or in order of appearance.
Highlighting, Dictionary, Wikipedia and Translate
To highlight a word or phrase, tap and hold on it, and then release. You can then select different highlighting colors, search for the definition in a Dictionary, Wikipedia or even translate it to another language. You can also insert a note on your Notebook or copy the word or phrase and paste it somewhere else.
There is a vast amount of book titles available for Kindle. I still enjoy reading paper books but sometimes weight, space or price constraints makes it more convenient to get the digital format.
There are also plenty of other useful Apps and features to be discovered on the iPad. Check out these iPad courses for iPadOS and iOS to learn more.


